SolidWorks Part Modeling Mastery
How One Engineer Rescued a Failing Assembly — And the Blueprint You Can Steal Today

The Assembly That Almost Ended a Career
Marcus Chen stared at the progress bar on his screen and felt his stomach drop.
Forty-seven minutes to rebuild a single assembly. The same assembly that needed to ship to manufacturing in seventy-two hours. The same assembly with fourteen parts throwing rebuild errors, six in-context references that had broken overnight, and a FeatureManager design tree so tangled that clicking "Suppress" on a single fillet caused a cascade of failures across three sub-assemblies.
Marcus had been a mechanical engineer for eight years. He'd designed everything from automotive brackets to industrial conveyor systems. He was good at SolidWorks — or so he thought. But right now, sitting in a cramped office at Meridian Manufacturing, watching that progress bar crawl like a wounded animal, he realized something terrifying:
He'd been modeling parts wrong his entire career.
Not wrong in the sense that they didn't work. They worked. They got machined. They shipped. But they were slow, fragile, and impossible for anyone else to modify. Every part was a ticking time bomb of inefficiency, held together by luck and brute-force computing power.
And now, with the biggest contract Meridian had ever landed — a custom packaging line for a multinational food processor — that luck had finally run out.
This is the story of how Marcus rebuilt his approach to SolidWorks part modeling from the ground up. More importantly, it's your blueprint for doing the same thing — before your assembly becomes the one that won't rebuild.
Part One: The Status Quo — "It Works, So Why Fix It?"
Marcus's approach to part modeling was the same approach most engineers learn: open SolidWorks, start sketching, add features until the part looks right, throw it into an assembly, and move on.
Sound familiar?
Here's what that approach actually produces:
The Hidden Cost of "Good Enough" Modeling
| Symptom | What It Looks Like | What It Actually Costs |
| Bloated rebuild times | Assembly takes 10+ minutes to open | Lost hours every single day |
| Fragile feature trees | One change breaks five features | Emergency rework under deadline pressure |
| Unmanageable file sizes | Parts over 50 MB each | Network slowdowns, version control nightmares |
| Undocumented design intent | No one else can modify your parts | You become the bottleneck for every change |
| Missing simplified configs | Full-detail parts in every assembly | RAM exhaustion on capable workstations |
| Orphaned in-context references | "Out of context" warnings everywhere | Geometry changes without warning |
Marcus had every single one of these symptoms. He just never connected them to a root cause.
His FeatureManager trees were forests of unnamed features — "Boss-Extrude14," "Cut-Extrude7," "Fillet23." His sketches were under-defined, held in place by hope and the fact that nobody had changed a dimension yet. His fillets were scattered throughout the tree instead of grouped at the bottom. And he had never — not once — created a simplified configuration.
The truth is, Marcus wasn't a bad engineer. He was an untrained one. Nobody had ever taught him that part modeling isn't just about making geometry. It's about making geometry that performs.
The Real Metric: It's Not "Does It Look Right?" — It's "Does It Rebuild Fast?"
Here's a principle that separates professional-grade SolidWorks work from amateur hour:
Every feature you add is a promise your computer has to keep — every single time the model rebuilds.
That fillet you added on feature #3? It has to rebuild before features #4 through #87 can even start. That in-context reference to a shaft diameter in another part? The entire assembly has to solve that relationship every time anything changes.
The question isn't whether your part looks correct. The question is whether your part can survive change — because change is the only guarantee in engineering.
Part Two: The Inciting Incident — When the Assembly Fought Back
The breaking point came on a Tuesday.
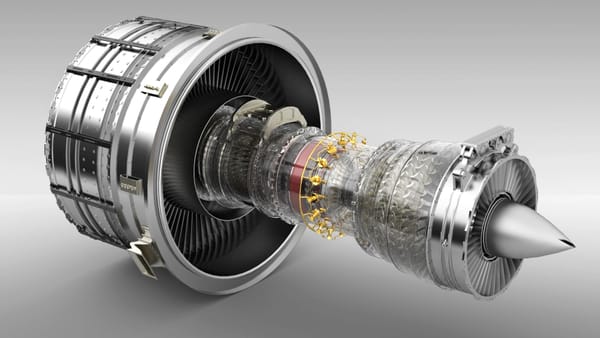
Marcus had been working on the main drive housing for the packaging line — a complex casting with forty-seven features, twelve fillets scattered throughout the tree, and three in-context references to mating components. He needed to change a single bore diameter from 45mm to 50mm.
He made the change. He hit rebuild.
The model exploded.
Not literally, of course. But the FeatureManager tree lit up like a Christmas tree of red X's. The bore change had invalidated a fillet that was placed too early in the tree, which broke a pattern that referenced that fillet's face, which destroyed a cut that was patterned on top of the first pattern, which orphaned an in-context reference in the mating shaft housing.
Eight hours of work. Gone. Because of a 5mm dimension change.
Marcus called his colleague, Priya Okonkwo, a senior designer who had been at Meridian for fifteen years. Priya took one look at his FeatureManager tree and said five words that changed everything:
"You never planned this part."
The Question That Changes Everything
Priya didn't mean Marcus hadn't thought about the part. She meant he hadn't established design intent before he started modeling. She pulled up a chair and walked him through the questions he should have asked before creating a single sketch:
The Design Intent Checklist
| Question | Why It Matters | Impact of Ignoring It |
| Where should the origin be? | Determines mating behavior in assemblies | Parts float, require extra mates, misalign |
| Is there symmetry? | Reduces features by 50% or more | Double the work, double the rebuild time |
| Which elements deserve their own features? | Controls tree organization and parent/child relationships | Tangled trees, cascade failures |
| Will you need configurations? | Determines file strategy and performance planning | Bloated files, no simplified option |
| Are there patterns? | Reduces repetitive work and enables Smart Fasteners | Manual placement of every instance |
| How will this part mate? | Drives origin placement and reference geometry | Fighting mates in every assembly |
| What properties are needed? | Enables accurate BOMs, weights, callouts | Manual data entry, errors in documentation |
| What's the right template? | Saves setup time on every new part | Re-entering settings for every file |
"You answered zero of these questions," Priya said. "You just started sketching."
Marcus looked at his destroyed model. She was right.
Part Three: The Struggle — Rebuilding from the Ground Up
Priya agreed to mentor Marcus through rebuilding the drive housing — properly this time. But she warned him: "Unlearning bad habits is harder than learning new ones. You're going to want to skip steps. Don't."
What followed was a masterclass in professional SolidWorks part modeling. Here's everything Marcus learned — organized so you can apply it immediately.
Planning Before Modeling — The Foundation Nobody Teaches
Start with the Origin
The origin isn't just a default point SolidWorks puts on your screen. It's the single most important decision you make about a part, because it determines how that part behaves in every assembly it ever enters.
Three Rules for Origin Placement:
Rule 1: Place the origin at the geometric center when symmetry exists.
If a part has symmetry — and most parts do — the origin belongs at the intersection of all planes of symmetry. When you do this correctly, the Top, Right, and Front planes become automatic mating references. No extra work. No extra planes. No extra mates.
Example: A Wide Flange Beam. Place the absolute center of the cross-section sketch on the origin. Extrude from the midplane. Instantly, the Top plane bisects the flanges, the Right plane bisects the web, and the Front plane sits at the midpoint of the beam's length. Three mating surfaces for free.
Rule 2: Align the origin to a layout grid for large assemblies.
In large assemblies — think production lines, structural frameworks, plant layouts — aligning part origins to the assembly's layout grid eliminates mates entirely. Insert the part at the assembly origin, fix it, and it's already positioned. Every feature location built relative to the origin automatically aligns with the grid.
This approach is uncommon in small assemblies or parts that appear in multiple assemblies. But for large, single-use assemblies, it's a massive time-saver.
Rule 3: Never let in-context creation put your origin in a bad location.
When you create a part in-context (inside an assembly), SolidWorks projects the assembly origin onto the Front plane of the new part. If the assembly origin is far from where your part actually sits, your part's origin ends up nowhere near its geometry. This is a problem that compounds over time and makes the part nearly impossible to reuse.
Fix it immediately. Or better yet, create your in-context relationships in a way that keeps the origin sensible.
Plan Your Features Before You Build Them
Marcus's original drive housing had forty-seven features because he added and removed geometry searching for the final form. Cuts to fix cuts. Fillets to smooth over mistakes. Bosses added as afterthoughts.
Priya's version of the same part? Twenty-two features. Same geometry. Same functionality. Half the tree, half the rebuild time, twice the clarity.
The Feature Planning Framework:
Step 1: Identify the PRIMARY SHAPE (extrude, revolve, loft, sweep)
Step 2: Identify SECONDARY SHAPES (cuts, bosses, shells)
Step 3: Identify PATTERNS (anything repeated)
Step 4: Identify COSMETIC FEATURES (fillets, chamfers, engravings)
Step 5: Order them — Primary → Secondary → Patterns → Cosmetics
This isn't just organization for organization's sake. It's performance architecture. Here's why:
Feature Management — The Art of Building a Clean Tree
The Fillet and Chamfer Rule
This is the single most impactful habit change Marcus made:
Place ALL fillets and chamfers at the bottom of the FeatureManager design tree. Combine them into the minimum number of features possible.
Why? Two reasons:
Reason 1: Rebuild speed. When you add new features during the design process, every feature below the new one has to rebuild. If your fillets are scattered throughout the tree — feature #5, #12, #23, #38 — then every addition forces fillets to rebuild repeatedly. Move them to the bottom, and they rebuild only once, after everything else is complete.
Reason 2: Suppression convenience. Fillets and chamfers grouped at the bottom can be dropped into a folder and suppressed with a single click. This is the fastest way to create a simplified configuration (more on that later). If they're scattered throughout the tree, suppressing them means hunting through dozens of features and risking parent/child failures.
Feature Statistics: Your Diagnostic Tool
Marcus had never used Feature Statistics. Priya made it his first stop for every part from that day forward.
How to access it: Evaluate > Performance Evaluation (previously called Feature Statistics)
This tool lists every feature in your part and its individual rebuild time. It's the X-ray that shows you exactly which features are slowing your model down.
What to do with the results:
| Rebuild Time | Action |
| < 1% of total | Leave as-is |
| 1-5% of total | Consider combining with similar features |
| 5-15% of total | Candidate for suppression in simplified config |
| > 15% of total | Investigate — likely a loft, sweep, or helix that can be simplified |
Feature Freeze: The Nuclear Option for Complex Parts
For parts with extremely long rebuild times, Feature Freeze locks features so they don't rebuild at all. Set the Feature Freeze bar at the bottom of the FeatureManager, and nothing rebuilds. This makes configuration changes nearly instantaneous.
The trade-off: frozen features won't update if upstream geometry changes. Use this when you're working on downstream features and don't need the frozen ones to respond to changes.
When to use Feature Freeze:
- Working on a single area of a complex part while other areas are stable
- Switching between configurations rapidly
- Running performance tests to identify bottleneck features
The Symmetry Advantage
The drive housing Marcus was modeling had bilateral symmetry. He'd modeled the entire thing — left side and right side, feature by feature. Forty-seven features.
Priya modeled half and mirrored it. Twenty-two features.
The math is brutally simple:
Full model: 47 features × rebuild time each = total rebuild
Symmetric model: 22 features × rebuild time each = ~50% total rebuild
But it's actually better than 50%, because mirrored bodies pattern surfaces instead of rebuilding geometry. The mirror operation doesn't recalculate every fillet radius and every cut depth on the mirrored side. It copies the already-solved surfaces. This is fundamentally faster than building geometry from scratch.
When to Use Symmetry
Use symmetry when:
- The part has one or more planes of symmetry
- Parts need to be centered on each other in the assembly
- You want to reduce both feature count and rebuild time
- Assembly mates need to reference center planes (symmetry gives you these for free)
The origin rule applies: If a part has symmetry, the origin belongs on the plane(s) of symmetry. Model half the part on one side, then mirror across the plane that passes through the origin.
Patterns — Power and Peril
Patterns are one of SolidWorks' most powerful tools, but Marcus learned the hard way that they can also be one of the most destructive.
His original drive housing had a bolt pattern — twelve holes arranged in a circle. He'd created a six-hole linear pattern, then patterned that pattern in a circular pattern to get the final layout.
Pattern on top of pattern. This is the single most common pattern mistake, and it's devastating for rebuild times.
Pattern Best Practices
| Do This | Not This | Why |
| Create ONE pattern with all features | Pattern on top of pattern | Single patterns solve faster; nested patterns multiply solve time |
| Move large patterns to the BOTTOM of the tree | Place patterns early in the tree | Allows other features to build first; enables easy suppression |
| Use feature patterns as sources for assembly patterns | Mate every fastener individually | Feature-driven patterns at the assembly level automatically populate fasteners |
| Use Smart Fasteners with patterned holes | Manually insert and mate each fastener | Pattern controls fastener positions instead of mates — dramatically faster |
The Assembly-Level Payoff
Here's where patterns become truly powerful: a feature pattern in a part can drive a pattern at the assembly level.
Create a bolt hole pattern in the part → Insert the part in the assembly → Use "Feature-Driven Pattern" to add fasteners → The fasteners automatically populate every hole in the pattern.
Change the number of holes in the part? The assembly pattern updates automatically. No new mates. No manual fastener placement. This cascading intelligence is only possible when you plan patterns at the part level.
Templates — The Time You'll Never Get Back
Marcus spent the first fifteen minutes of every new part adjusting document settings. Units. Decimal places. Image quality. Material. Custom properties. Background color.
Fifteen minutes per part. Twenty parts per project. Five hours of setup — just entering the same information over and over.
Templates eliminate this entirely.
What a Professional Template Includes
| Template Element | What It Saves | Setup Time (One-Time) |
| Document properties | Units, tolerances, dimension standards | ~5 minutes |
| Visual properties | Model appearance, background, materials | ~3 minutes |
| Custom properties | Company name, address, creator, material, weight | ~5 minutes |
| Display settings | Image quality balanced for visibility and performance | ~2 minutes |
| Pre-assigned materials | Consistent density for mass calculations | ~1 minute |
One-time setup: ~16 minutes per template. Time saved per part: ~15 minutes. Break-even: After the second part.
Create specific templates for different customers, different material types, different manufacturing processes. The investment is trivial. The return is permanent.
Custom Properties: The Invisible Foundation
Custom properties don't just save time — they enable automation downstream. When properties like material, weight, creator, and part number are embedded in the template:
- BOMs auto-populate with accurate data
- Part callouts in drawings pull directly from properties
- Assembly weights calculate automatically
- PDM systems can search, sort, and filter by property values
If your custom properties are inconsistent or missing, every downstream document becomes a manual data-entry exercise. Templates make consistency automatic.
Configurations — The Double-Edged Sword
This is where Marcus's education took an unexpected turn. He'd assumed configurations were universally good — more configurations meant more flexibility. Priya showed him the dark side.
The Configuration Paradox
Benefits of configurations:
- Manage multiple variations in a single file
- Reduce the number of part files to track
- Enable design tables for parametric control
- Allow simplified versions for assembly performance
Costs of configurations:
- Each activated configuration increases file size
- Larger files slow network transfers
- More data loaded into RAM when opening assemblies
- File size compounds when configurations multiply across parts
The Critical Rule
When a configuration is activated, its data is created and permanently saved in the file.
This means that if you have a part with 20 configurations and you activate all of them (even just to check something), your file now contains the geometry data for all 20 variations. The file size may double, triple, or worse.
The workaround: File > Save As — saving with "Save As" keeps only the data for the active configuration. This can dramatically reduce file size.
In assemblies: Only the configurations actually used in the assembly are loaded into memory. But if the part file itself is bloated from activated configurations, opening it across a network is still slow.
Simplified Configurations: The Non-Negotiable Practice
If Marcus took away one single practice from his training with Priya, it was this:
Every part that goes into an assembly MUST have a simplified configuration.
A simplified configuration strips a part down to only what the assembly needs:
Include in simplified configuration:
- Mating surfaces (the geometry that defines how parts connect)
- Interference surfaces (the geometry that prevents parts from occupying the same space)
Exclude from simplified configuration:
- Fillets and chamfers (cosmetic, not structural at the assembly level)
- Engraving and text (visual detail, not functional)
- Small detail features (create excessive triangles that kill graphics performance)
The Triangle Problem
This is something most engineers never think about, and it's one of the biggest performance killers in SolidWorks.
Every curved surface in your model is displayed as a mesh of tiny triangles — just like finite element analysis. Small features (small fillets, engraved text, thread details) create enormous numbers of tiny triangles relative to their visual importance.
A single detailed fillet on a small edge can generate more display triangles than the entire rest of the part.
In a simplified configuration, these features are suppressed. The triangle count drops. Graphics performance improves. Assembly manipulation becomes smooth instead of stuttery.
The Naming Convention That Saves Hours
SolidWorks can open every component in an assembly using a specific configuration name — but it can only select one name for all components. This means your entire company needs to use the same name for simplified configurations.
Pick a standard. Enforce it. Capitalize consistently.
"Simple" and "simple" are two different configuration names in SolidWorks. If half your team uses one and half uses the other, the batch-open feature fails.
Recommended approach: Establish a company-wide standard. Document it. Put it in the template.
The Simplify Tool
For parts that already exist without a simplified configuration, SolidWorks provides the Simplify tool:
Path: Tools > Find/Modify > Simplify
This tool analyzes every feature in the part and lets you select features based on their size relative to the whole part. Select all the small features, click "Suppress," and a derived configuration is automatically created.
It's not a replacement for planning — but it's an excellent rescue tool for legacy parts.
The Fastener Problem — Toolbox Done Right
Marcus's assemblies had hundreds of fasteners, each with fully modeled threads, each mated individually. Opening the assembly loaded every thread helix into memory. The graphics card wept.
Priya showed him the two Toolbox approaches and why the choice between them matters enormously in large assemblies.
Toolbox Setup: Master Parts vs. Copied Parts
| Approach | How It Works | Advantage | Disadvantage |
| Master Parts | Toolbox maintains master files; inserting a fastener creates a new configuration of the master | Fewer files to manage | Master files grow as configurations accumulate; files on network slow performance |
| Copied Parts | Inserting a fastener creates a new, independent part file | Files are small (single configuration); can be stored locally with the assembly | More files to manage |
For large assemblies, Copied Parts wins. Small, single-configuration files stored locally with the assembly open faster than bloated master files pulled across a network.
Thread Display: The Performance Multiplier
| Thread Option | Visual Quality | Performance Impact |
| Simplified (no threads) | Low — cylindrical surfaces only | Best — minimal triangles |
| Cosmetic (texture map) | Good — thread appearance applied to surface | Moderate — visual only, no geometry |
| Modeled (helical threads) | Exact — true 3D helix geometry | Worst — 5× or more triangle increase |
Fasteners are purchased parts. You never machine threads in SolidWorks. There is no engineering reason to model helical threads on a purchased bolt.
Use simplified threads for design work. Use cosmetic threads only if you need visual representation for rendering.
The triangle multiplication is staggering:
Bolt without modeled threads: ~500 display triangles
Bolt WITH modeled threads: ~2,500+ display triangles (5× increase)
Assembly with 200 bolts:
- Without threads: ~100,000 triangles from bolts
- With threads: ~500,000 triangles from bolts
- Difference: 400,000 unnecessary triangles
Multiply this across your entire assembly and you begin to understand why some assemblies crawl while others fly.
Purchased Components — Less Is More
The packaging line Marcus was designing included motors, bearings, sensors, and actuators from various suppliers. Each vendor provided a CAD model. Each model was absurdly detailed.
One motor model had modeled cooling fins, embossed text, internal winding geometry, and individual wire representations. The file was 87 MB. For a single motor.
You don't need any of that.
The Detail Elimination Checklist
| Feature Type | Do You Need It? | What to Do Instead |
| Helical threads | No — purchased part, not machined | Model smooth cylinder |
| Embossed/engraved text | No — cosmetic only | Remove entirely or use decal |
| Internal detail | No — not visible or functional in assembly | Remove or suppress |
| Detailed springs | No — helix creates massive file | Use bounding cylinder |
| Decorative fillets | No — cosmetic only | Suppress in simplified config |
| Lofts and sweeps | Only if geometry can't be achieved with extrude/revolve | Replace with simpler features where possible |
The Spring Trap
Springs deserve special attention because they're a common performance killer. A spring is a sweep along a helix — and helical surfaces are among the most expensive geometry in SolidWorks.
Instead of modeling a spring, create a cylinder that matches the spring's bounding shape. This cylinder:
- Can be mated identically to a spring
- Detects interference identically
- Solves in a fraction of the time
- Reduces file size by an order of magnitude
If you need visual representation for a rendering, add a decal or spring appearance to the cylinder's surface.
Modeled Text: The Hidden Monster
Text in SolidWorks uses TrueType fonts from the operating system. A single letter can contain hundreds of sketch entities — curves, splines, and arcs that define the font's outline.
Extrude a word, and you've potentially added thousands of entities and the corresponding surface geometry to your model. Use Performance Evaluation to see the actual impact — it's often shocking.
Rule: Do not model text unless it's part of a casting or will be machined into the part. For everything else, use decals or annotations.
The Fully-Defined Sketch Imperative
Marcus had a bad habit of leaving sketches under-defined during early design work. "I'll go back and fix them later," he told Priya.
"You won't," she said. "And even if you do, by then the damage is done."
An under-defined sketch is a sketch that can change shape when anything in the model changes. A dimension update three features upstream might cause an under-defined sketch to shift in unpredictable ways — subtly enough that you don't notice until the part is manufactured wrong.
Before a part enters an assembly, every sketch must be fully defined. No exceptions.
Leaving sketches under-defined during early conceptual work is acceptable. But that's a temporary state — like scaffolding on a building. You remove it before anyone moves in.
In-Context Modeling — The Power and the Danger
This chapter represents the most nuanced lesson Marcus learned. In-context modeling is simultaneously one of SolidWorks' greatest features and one of its most dangerous.
What In-Context Modeling Does
When you create or modify a part inside an assembly, you can reference geometry from other parts. SolidWorks creates an external reference — a live link between the feature you're creating and the geometry you referenced.
Example: You're creating a bracket that mounts to a motor housing. Instead of measuring the motor's bolt pattern and entering the dimensions manually, you reference the motor's bolt holes directly. If the motor changes, the bracket updates automatically.
This is incredibly powerful during the design phase. Changes propagate. Parts stay coordinated. The assembly evolves as a system rather than a collection of independent files.
Where In-Context Modeling Breaks Down
The problems emerge when you stop designing and start releasing parts:
Problem 1: Performance
Every in-context reference creates work for the assembly solver. The relationship between the feature and the entity it references is maintained at the assembly level. More in-context references = more solving = slower rebuilds.
Problem 2: Unexpected Changes
If someone modifies the motor housing — even a minor change to an unrelated face — the bracket's in-context features might update in ways nobody anticipated. The change propagates silently. Nobody notices until the bracket doesn't fit on the shop floor.
Problem 3: Origin Displacement
When a part is created in-context, its origin is determined by the assembly origin projected onto the selected plane. If the assembly origin is far from the new part's geometry, the part's origin ends up in a bad location — making the part nearly impossible to reuse in another assembly.
Problem 4: Assembly Lock-In
In-context references are stored in and controlled by the assembly where they were created. If you copy the part to another assembly, the references either break or attempt to resolve against geometry that doesn't exist — causing errors and confusion.
The In-Context Decision Matrix
| Scenario | Use In-Context? | Reasoning |
| One-of-a-kind part, used only in this assembly | Yes | Propagating changes is valuable; no reuse risk |
| Part used in multiple assemblies | No | External references create assembly lock-in |
| Early design phase, geometry still evolving | Yes | Coordination between changing parts saves time |
| Parts released to manufacturing | Remove references first | Prevent unintended changes post-release |
| Customer likely to request changes after manufacturing begins | Lock references | Maintain relationships but prevent auto-propagation |
The InPlace Mate: What It Is and Why It Exists
When you create a part in-context, SolidWorks automatically adds an InPlace mate to prevent the part from moving. This exists because the in-context references cross between parts at the assembly level — if the part moves, those references can cause geometry to change in unexpected ways.
If you need the part to move, replace the InPlace mate with standard mates that provide the degree of freedom you need. Choose a face perpendicular to the direction of motion — this won't affect the part origin.
Warning: Deleting an InPlace mate triggers a cascade. The base sketch contains references to other assembly entities. Once the mate is deleted, these references may update unpredictably because the part is no longer positioned relative to the assembly. SolidWorks will prompt you to remove these references — no geometry is deleted, but the relationships are severed.
The External Reference Lifecycle
Here's the lifecycle Priya taught Marcus for managing in-context references:
CREATE → USE → LOCK → (UNLOCK if needed) → BREAK or COPY
Step 1: Create — Build the in-context features during design. Let changes propagate freely.
Step 2: Use — Work with the assembly. Validate the design. Make sure everything fits.
Step 3: Lock — Once the design stabilizes, lock all external references. This freezes the relationships — changes to referenced geometry no longer propagate.
Step 4: Unlock (if needed) — If a design change occurs, unlock the references, rebuild the assembly to propagate changes, then lock again.
Step 5: Break or Copy — For final release:
- Break All severs all references permanently. Changes never propagate again. The FeatureManager shows "->x" symbols. This is irreversible.
- Lock All freezes references but keeps them restorable. The FeatureManager shows "->*" symbols. This is reversible.
- Save As Copy creates a duplicate part with no references. The cleanest option for reuse.
Priya's recommendation: Use Lock All in most situations. It provides the safety of severed references with the flexibility of restoration. Only use Break All when you're absolutely certain the references will never be needed again.
The Reference Status Indicators
| Symbol | Status | Meaning |
| -> | In-context | Reference is active and updating |
| ->? | Out of context | Assembly is not open; reference can't update |
| ->* | Locked | Reference exists but is frozen |
| ->x | Broken | Reference is permanently severed |
Error Management — Fix It Now or Pay Later
Three weeks into the rebuild, Marcus encountered an import error on a vendor-supplied motor housing. The model had a bad surface — a tiny geometric fault that SolidWorks flagged but didn't prevent him from adding features.
"I'll fix it later," he said.
Priya didn't even bother responding. She just pointed at the whiteboard where she'd written:
"Building features on top of errors is building a house on a cracked foundation."
Marcus fixed the import error. It took twenty minutes. If he'd continued building? The error would have compounded through every feature that referenced the bad surface, eventually requiring a complete rebuild — hours, not minutes.
The Error Response Protocol
| Error Type | When to Fix | Tool to Use | What Happens If You Wait |
| Rebuild errors | Immediately | FeatureManager error indicators | Errors compound; later features inherit problems |
| Import errors | Before ANY additional features | Import Diagnostics | Tool becomes unavailable after first edit; errors become permanent |
| Geometry errors | During regular checks | Check (Evaluate > Check) |
Short edges cause downstream feature failures |
| Under-defined sketches | Before assembly insertion | Sketch status indicator | Geometry shifts unpredictably under dimensional changes |
Import Diagnostics: Use It Once or Lose It
Import Diagnostics is a one-shot tool. It only works on an unmodified imported body. The moment you add a single feature to an imported part, Import Diagnostics is permanently unavailable.
Workflow for every imported model:
- Import the model
- Run Import Diagnostics immediately
- Fix every flagged issue
- Then start adding features
The Check Tool: Your Ongoing Diagnostic
Unlike Import Diagnostics, the Check tool can be used at any time.
Path: Evaluate > Check or Tools > Check
Check identifies:
- Geometry errors (invalid surfaces, failed faces)
- Short edges (edges so small they cause downstream geometry to fail)
- Undesirable geometry (self-intersecting surfaces, sliver faces)
Run Check regularly — especially before inserting a part into an assembly.
Common Tools for Assembly-Level Part Creation
When Marcus started creating parts within assemblies, he discovered tools that made the process dramatically more efficient.
Convert Entities and Offset Entities
Inside an assembly, you can sketch on a part and reference surrounding geometry using:
- Convert Entities — Projects edges from other parts onto your active sketch plane
- Offset Entities — Creates geometry offset from edges of other parts
Both create external references by default. If you don't want those references, adjust the setting:
Path: Tools > Options > External References
With external references disabled, converted geometry is duplicated without constraints. No dimensions or relations are created to other components. The geometry exists independently in your part — no assembly dependencies.
Hole Series: Assembly-Level Holes
Hole Series is a specialized Hole Wizard hole created at the assembly level. It automatically generates in-context holes in all referenced components — the top plate, the spacer, the bottom plate, all with correctly sized holes from a single operation.
The trade-off: Hole Series creates in-context features that must be solved at the assembly level. This adds to assembly rebuild time. Use it when the convenience outweighs the performance cost — typically during early design when hole locations are still evolving.
When to Remodel — The Hardest Decision in Engineering
Six weeks into the rebuild project, Marcus hit a wall. One of the secondary parts — a guide rail bracket — had accumulated so many added and removed features that its FeatureManager tree was incomprehensible. The part worked, technically. But a minor change to a single dimension caused a rebuild failure.
Priya asked the question that every engineer dreads:
"Should you remodel it from scratch?"
The Remodeling Decision Framework
| Factor | Remodel | Don't Remodel |
| Is the part a one-time-use component? | Lower priority | Higher priority to avoid |
| Will the part be used in future designs? | Remodel — investment pays dividends | Less critical |
| Is a minor change causing rebuild failures? | Remodel — the part is fundamentally fragile | Consider targeted fixes |
| Are there multiple inefficient parts in the assembly? | Remodel — cumulative rebuild impact is severe | Evaluate case by case |
| Is the final geometry known? | Remodel — you already know the destination | Riskier if design is still evolving |
| Is the deadline immovable? | Weigh cost of remodel vs. cost of failure | Weigh cost of maintaining the fragile part |
The insight Marcus almost missed:
Remodeling usually takes less time than expected because you already know the final geometry.
When you originally modeled the part, you were exploring. Adding. Removing. Backtracking. The FeatureManager tree records every detour. Remodeling from scratch with the final form already known is a straight line — no detours, no dead ends, no exploratory features that never got removed.
Marcus remodeled the guide rail bracket. The original had thirty-one features. The remodel? Fourteen. Time to remodel: forty-five minutes. Time he would have spent fighting the original over the rest of the project: incalculable.
The SpeedPak Secret
Late in the project, Priya introduced Marcus to one more tool — the one she called "the biggest performance win most engineers have never heard of."
SpeedPak configurations create a lightweight representation of an assembly that includes only selected faces and edges. They load into higher-level assemblies with a fraction of the memory footprint.
For huge savings in computational and memory requirements, consider SpeedPak configurations for all sub-assemblies.
SpeedPak doesn't replace simplified part configurations — it works at the assembly level, creating a minimal representation of an entire sub-assembly.
Mate References — The Automation Nobody Uses
For parts that appear once in an assembly, manual mating is fine. But Marcus's packaging line had over a hundred instances of the same guide bracket, each mated individually. Three mates per bracket. Three hundred mates. Each one placed by hand.
Mate References solve this permanently.
When you establish Mate References on a reusable part, SolidWorks automatically applies the defined mates when you insert the part into an assembly. Define the references once. Insert the part a hundred times. The mates apply themselves.
The time savings scale linearly with the number of instances:
Manual mating: (Instances) × (Mates per instance) × (Time per mate)
With Mate Refs: (One-time setup) + (Instances × near-zero insertion time)
Example — 100 brackets, 3 mates each, 30 seconds per mate:
Manual: 100 × 3 × 30s = 9,000 seconds = 2.5 hours
Mate Refs: 15 min setup + 100 × 5s = 23 minutes
Savings: Over 2 hours per assembly
Part Four: The Transformation — The "Aha!" Moment
Eight weeks after Priya's first intervention, Marcus opened his rebuilt assembly.
Rebuild time: 3 minutes, 12 seconds.
Down from forty-seven minutes. A 93% reduction.
The FeatureManager tree for the drive housing — the part that had started it all — was clean, organized, and logical. Twenty-two features instead of forty-seven. Every fillet at the bottom. Every sketch fully defined. A simplified configuration that loaded in seconds. Mate references on every reusable bracket. No orphaned in-context references. No modeled threads. No embossed text on purchased components.
But the numbers only told part of the story.
The real transformation was this: when the customer requested a change to the main drive bore — from 50mm to 55mm — Marcus made the change in twelve seconds and the assembly rebuilt without a single error.
The same type of change that had destroyed his model two months earlier now propagated cleanly through twenty-three mating components, updated automatically in three drawing views, and recalculated the BOM without manual intervention.
That was the moment Marcus understood what Priya had been teaching him all along:
Part modeling isn't about making shapes. It's about making systems that survive change.
Part Five: Your Takeaway — The Complete Reference
Everything Marcus learned is captured in the reference materials below. Print them. Pin them to your wall. Refer to them before every new part.
The Master Checklist: Before You Create a Single Sketch
| # | Question | Answer Drives... |
| 1 | Where should the origin be? | Mating behavior, assembly alignment |
| 2 | Does the part have symmetry? | Feature count, rebuild time, mirror strategy |
| 3 | Which elements need their own features? | Tree organization, parent/child relationships |
| 4 | Will configurations be needed? | File strategy, performance planning |
| 5 | Are there repeating patterns? | Pattern strategy, Smart Fastener capability |
| 6 | What view will be the Front View for detailing? | Drawing setup, special view requirements |
| 7 | How will this part mate in the assembly? | Origin placement, reference geometry, mate references |
| 8 | What custom properties are needed? | BOM accuracy, part callouts, PDM searches |
| 9 | Is the right template selected? | Settings, materials, properties — all pre-loaded |
| 10 | What display settings balance visibility and performance? | Image quality, background, rendering mode |
The Feature Ordering Rule
┌─────────────────────────────────────────┐
│ TOP OF FEATUREMANAGER TREE │
│ ───────────────────────────────────── │
│ 1. Primary shape (extrude/revolve) │
│ 2. Major cuts and bosses │
│ 3. Secondary geometry │
│ 4. Small cuts and detail features │
│ 5. Patterns (largest at bottom) │
│ 6. ────── FOLDER: Cosmetics ────────── │
│ 7. Fillets (combined by size) │
│ 8. Chamfers (combined by size) │
│ 9. Engraving (if required) │
│ ───────────────────────────────────── │
│ BOTTOM OF FEATUREMANAGER TREE │
└─────────────────────────────────────────┘
Configuration Strategy Map
| Configuration Name | Purpose | Contains | Excludes |
| Default (Full) | Manufacturing, rendering | ALL features — complete detail | Nothing |
| [Company Standard Name] | Assembly performance | Mating surfaces, interference surfaces | Fillets, chamfers, text, small details |
| Drawing | 2D documentation | All features minus tangent-edge fillets | Features that obscure views |
| SpeedPak | Large assembly performance | Selected faces and edges only | Everything not selected |
| Analysis | FEA / simulation | Application-specific suppressions | Features irrelevant to analysis |
The Level of Detail Reference
| Feature Type | Model It? | Alternative | Performance Impact |
| Helical threads | No | Smooth cylinder + cosmetic texture | 5× triangle reduction |
| Embossed/extruded text | Only for castings/machining | Decals or annotations | Hundreds of entities per letter |
| Detailed springs | No | Bounding cylinder + decal | Order-of-magnitude file size reduction |
| Lofts and sweeps | Only if extrude/revolve can't achieve it | Simpler features | Significant regeneration time |
| Internal detail on purchased parts | No | Remove or suppress | Unnecessary geometry and triangles |
| Cosmetic fillets | Only in full configuration | Suppress in simplified config | Direct rebuild time impact |
In-Context Reference Quick Guide
DESIGN PHASE STABILIZATION RELEASE
───────────── ────────────── ────────
Create in-context ──────────► Lock references ──────────► Break or Save As Copy
references freely (->*) (->x or clean file)
│
▼
Need changes?
Unlock → Rebuild → Lock again
External Reference Symbols
| Symbol | Name | Meaning | Action Required |
| -> | In-context | Active, updating | None during design |
| ->? | Out of context | Assembly not open | Open assembly to update |
| ->* | Locked | Frozen, restorable | Unlock only if changes needed |
| ->x | Broken | Permanently severed | None — irreversible |
Error Response Quick Reference
| Situation | Response Time | Tool | Consequence of Delay |
| Rebuild error appears | Immediately | FeatureManager | Cascade failures |
| New model imported | Before first edit | Import Diagnostics | Tool permanently lost |
| Suspect bad geometry | Regular checks | Check (Evaluate menu) | Downstream feature failures |
| Sketch under-defined | Before assembly use | Sketch status | Unpredictable shape changes |
The Question That Matters Now
Marcus's story is done. Yours is just beginning.
Look at your current project. Open your most complex assembly. Run Performance Evaluation on your slowest part. Check your FeatureManager tree — are the fillets at the bottom? Are your sketches fully defined? Do you have a simplified configuration?
If the answer to any of those questions is "no," you now have the blueprint to fix it.
The difference between an assembly that takes 47 minutes to rebuild and one that takes 3 minutes isn't talent. It isn't hardware. It isn't software version.
It's planning.
Start with the checklist. Build the templates. Establish the naming convention. Move the fillets. Create the simplified config. Lock the references.
Every part you model from today forward can be the part that survives change instead of the part that breaks under it.
What's the first thing you're going to fix in your current project? Drop a comment below — and if this guide saved you even one rebuild cycle, share it with an engineer who needs it.
This is a comprehensive reference guide. Bookmark it. Return to it. The principles don't change — but your assembly performance will.